『Escape from a Silent World 』Ending page(2 Players)
▼Ending movie
▼Game explanation
Ending movie
Game explanation
STEP1
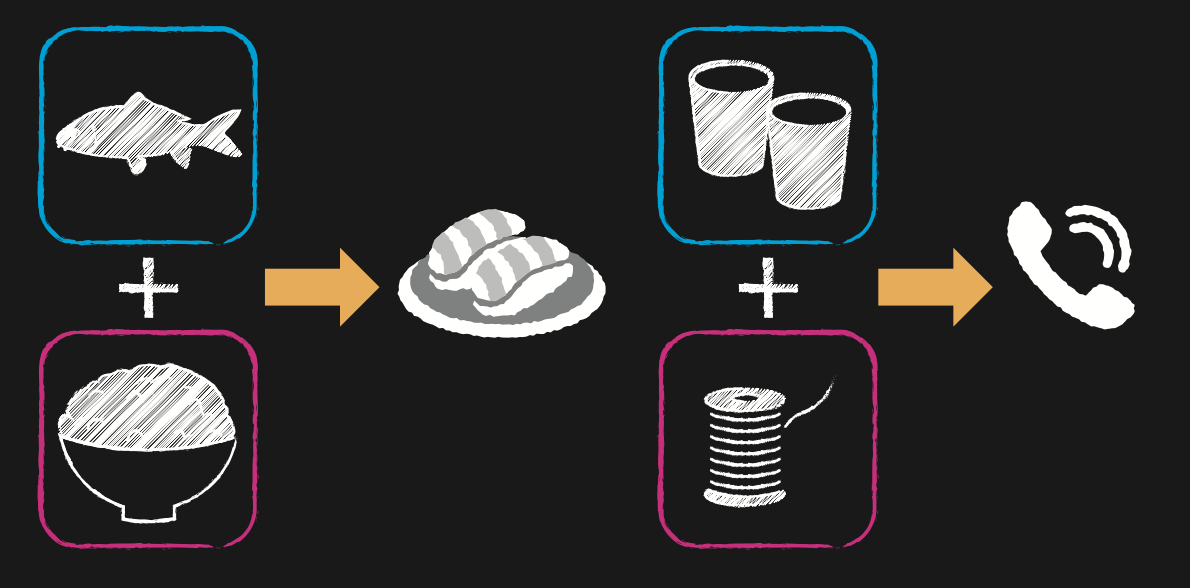
Add together the images in the two booklets. You will need to convey the numbers, symbols, and illustrations using gestures.
STEP2
When gesturing the poses drawn in your respective booklets, you’ll realize they’re connected with each other. Press the symbols on the screen in order so that all the poses connect.
STEP3
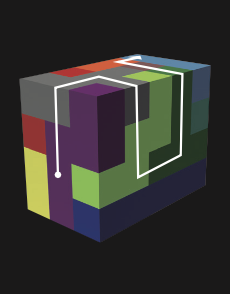
Build a rectangular prism using the colored blocks based on each layer’s cross-section diagram in each booklet, and a single arrow will appear. Press the colors in order to continue to the next step.
STEP4
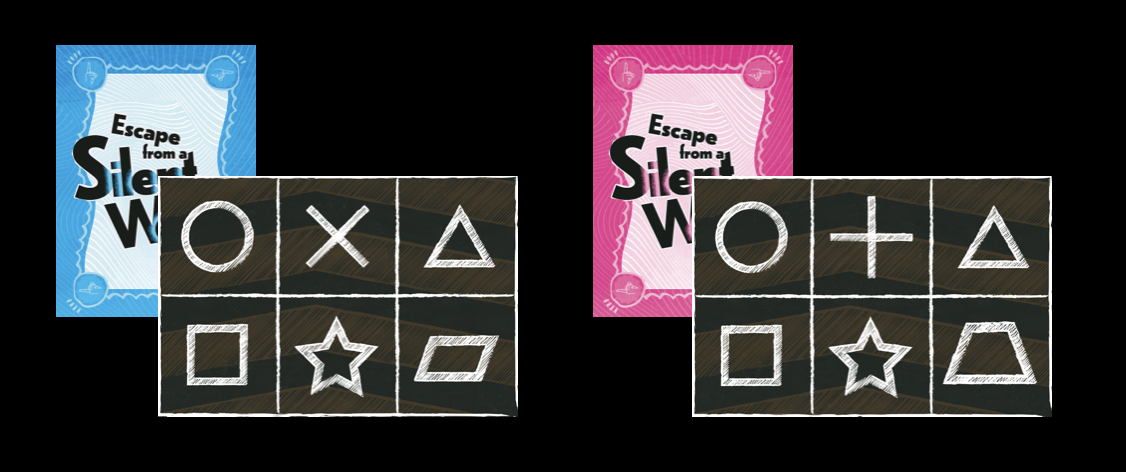
Out of the all the symbols drawn in both booklets, only two are different. Identify them to continue to the next step.
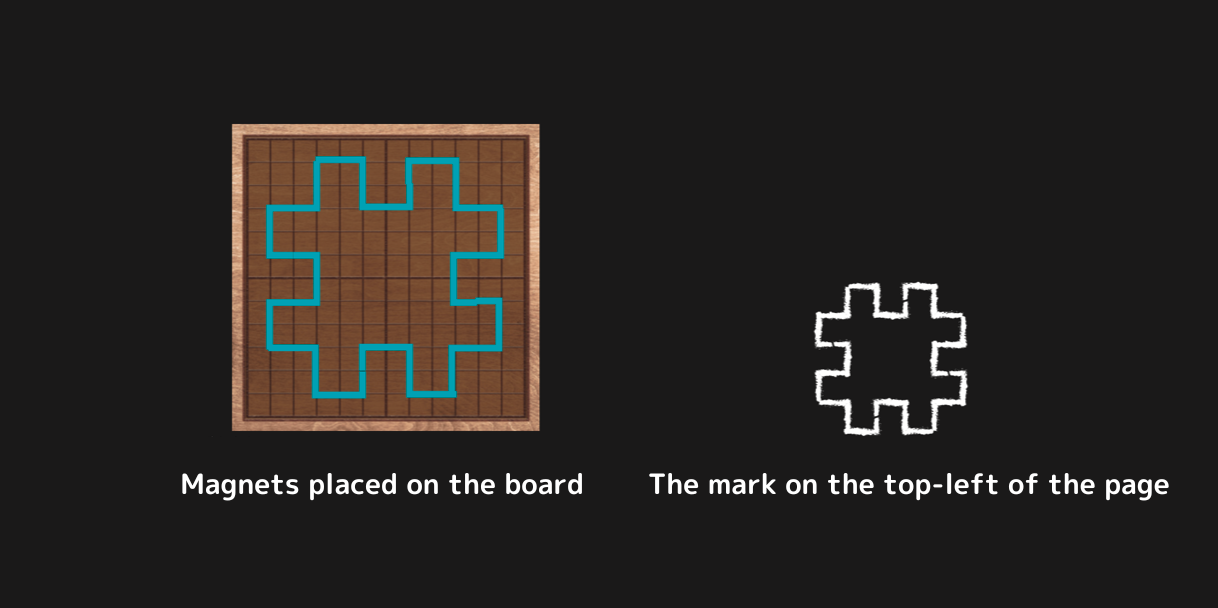
STEP5
Placing the magnets according to the diagrams in both booklets will create a shape. The last shape you create will lead you to a page in the booklet with the same shaped mark. Tap the tablet screen according to the instructions on this page to continue to the next step.
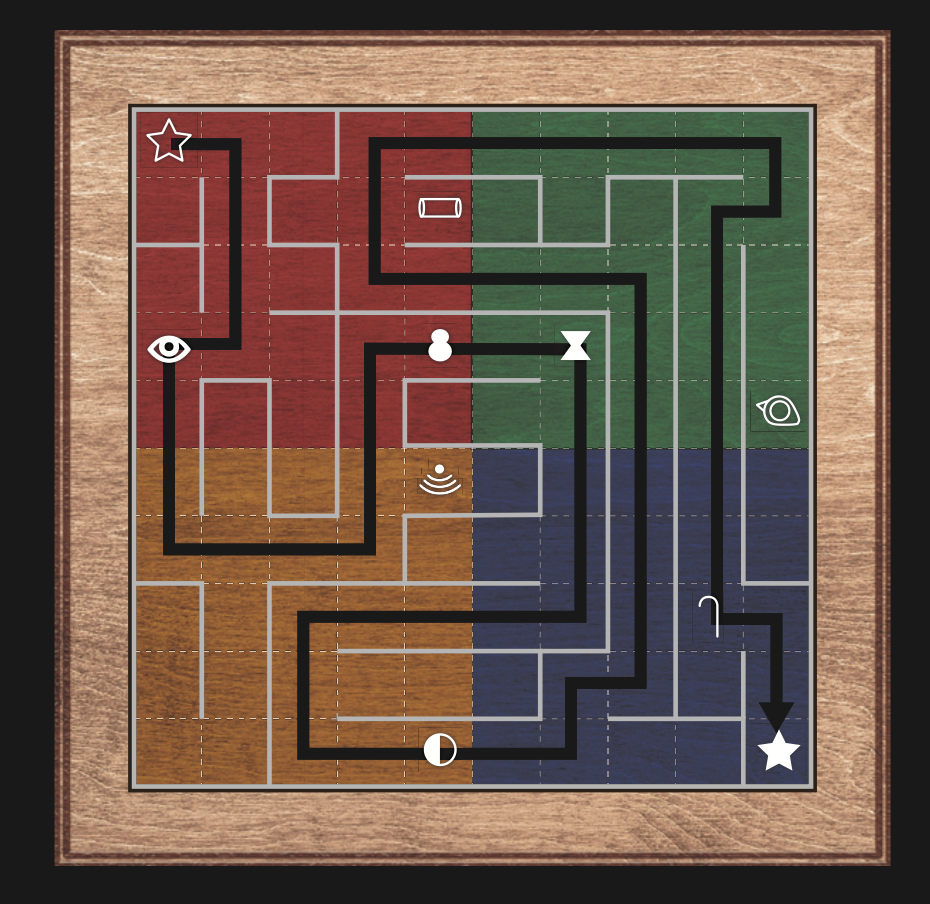
STEP6
Place the new puzzle pieces you’ve obtained on the board and navigate the maze drawn in your booklets. Press the 5 symbols you pass through in order to continue to the next step.
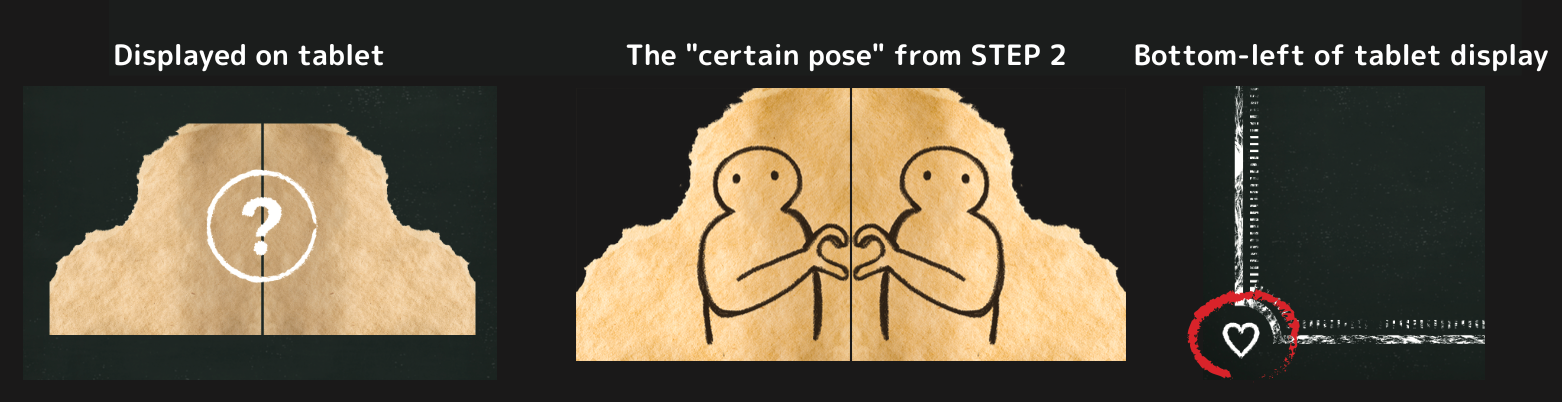
STEP7
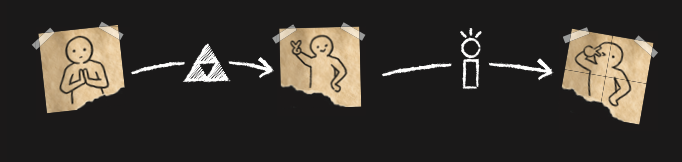
The torn pieces of paper shown here point to a certain pose from STEP 2. Both images show a figure making a “C” shape with their hands. When the two of you copy this pose and combine them, your hands will create a heart, which corresponds with the “?”. You can find this same shape on the bottom-left corner of your tablet display. Tap it to continue to the next step.
STEP8
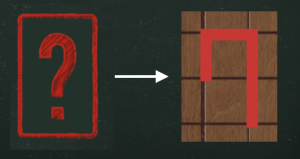
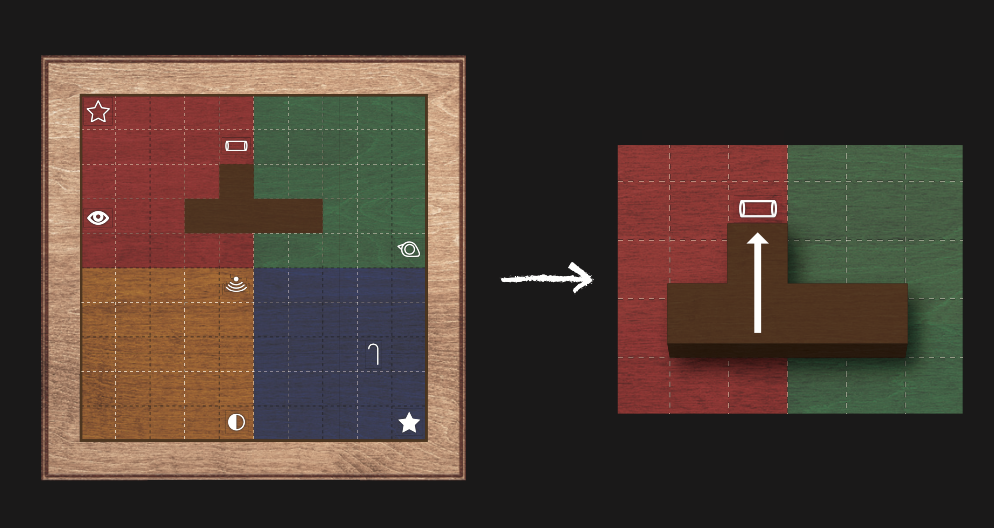
The image on the left side of the tablet screen is the maze board you used in STEP 6. The image on the right side are the two symbols you should remove.
Remove the piece containing these two symbols, and a brown shape will appear.
There should be something with the same exact shape and color on your table. It’s one of the colored blocks you used to create the rectangular prism earlier.
Align this block perfectly into the empty space on the board. The arrow will point to a certain mark.
On the page with this same mark, it will show you the places on the tablet screen where the two of you need to tap.
Tap these two areas to continue to the last puzzle.


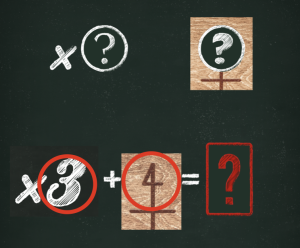
STEP9
Search through your game items to find the areas where the “?”s on the tablet refer to, and you’ll learn that they are “3” and “4” respectively.
Add 3+4 to get 7, the number that replaces the “?” in the red vertical rectangle.
The picture shows a hand holding out the red 7 towards something, which means the red 7 is an actual object you can hold in your hand.
Among the types of magnets you used in STEP 5, there was one that was red and shaped like the number 7. It seems like you need to give this to someone.
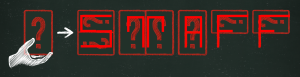
Rotate and flip the red magnets to match the direction of the “?”s shown on the tablet, and you’ll get the word “STAFF”.
Follow the instructions and give a red magnet to the staff, and you’ll obtain a key. Open the bag on your table with this key, and you’ll get the final answer: “0407”.